Into the Rabbit Hole: A beginners guide to Mechanical Keyboards
It started innocuously enough. A video, a word. Thock. Or perhaps a reel. Creamy. Maybe a post on r/mechanicalkeyboards on r/popular. Whatever piqued your interest, you decided to look deeper into “Mechanical Keyboards”. The endless scroll of YouTube and Instagram were rich with misinformation, often nothing but shallow attempts to manufacture desire. Ironically, you ended up here – a blog for an online store.
Fortunately, while my day job is selling keyboards to you, I am not interested in furthering mis-information. I believe that an informed customer is a repeat customer.
So let’s take it from the top – What even is a mechanical keyboard?
1. What is a mechanical keyboard?
Simply put – a keyboard that relies on mechanical devices (“switches”) under every key. This is opposed to membrane keyboards, which rely on a single membrane sheet for all keypresses.
It is the difference between a chronometer and a watch you bought from a roadside hawker.
2. What makes mechanical keyboards special?
This is the million dollar question. The answer is simple – it is a hobby. Like watches, anime figurines or selvedge denim. It is an appeal that extends far beyond it’s utility as a typing implement. Craftsmanship. Aesthetics. Personalization. And yes, functionality. There are many reasons an individual dives into this world.
Unlike buying watches to admire, figurines to display, or denim to wear – a keyboard hobbyist’s role extends far beyond that of a caretaker. You actively participate in how the keyboard is shaped, obsessing over every sound, every tap along with every click. Building, tuning and rebuilding your keyboard are necessary as well. The layout, the sound, the feel of the switches, how stiff or bouncy the typing experience is, the aesthetics of the keyboard. There is an endless depth to the customizability.
You have the full range layouts from ergo options like the Corne, to standard ANSI 104 options, to intensely personalized options like the Dactyl Manuform or options out of left field like the Glove80.
A side-effect of this is that no matter what the SEO optimized pages tell you, there is no “best” mechanical keyboard in 2025, or indeed any year for that matter.
3. The anatomy of a keyboard
Plastic and metal, circuits and dampening. These components are the foundation of the keyboard:
- Keycaps – The part your fingertips touch in normal operation. Most are plastic (ABS/PBT/PC), but if you have money to burn, you can get options made out of metal and ceramic.
- Switches – The actuation mechanism. Overwhelmingly based on Cherry’s MX design, but by no means limited to it. There has been an explosion in variety ever since Cherry’s patent expired.
- Plate – A sheet with holes in it. To hold the switches in place.
- The PCB (Printed Circuit Board) – The nervous system of the keyboard. It translates your keypresses into input.
- The case – The outer shell. The carapace. May be designed to make you forget that you spent a month’s rent on a keyboard.
- Foam – Makes your keyboard quiet. Much like the voices in my head, some keyboards need to be made quiet.
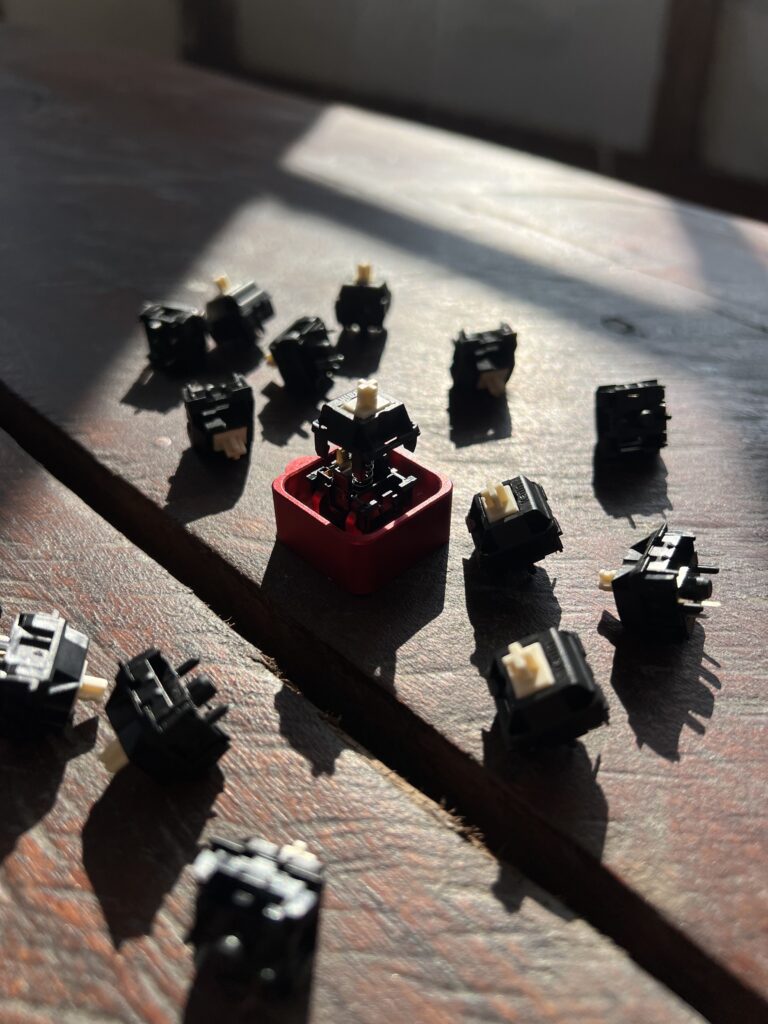
4. So what even is a switch?
The boring answer is that it is the contact mechanism that completes a circuit when it is pressed, allowing the PCB to detect keypresses. The romantic answer is that it is the soul of the keyboard. The correct answer is that it is a tiny spring-loaded money pit.
Switches are their own rabbit hole, which will take up their own blog post.
5. Choosing your mount
- Tray mount – the PCB is screwed into the bottom of the case
- Top and bottom mounts – the plate is screwed to the top or the bottom case respectively.
- Sandwich mount – the plate is placed between the top case and the bottom case
- Integrated plate – The plate is a part of the top case.
- Gasket mount – The plate (or sometimes the PCB) is mounted on rubber, polyurethane, or other soft materials.
- O-ring gasket mount (also called Bakeneko or sometimes Neko mount) – plate-pcb assembly is friction fit into the case.
- Burger mount – The plate is placed on small o-rings on the case.
- Leaf-spring mount – The plate has leaf springs cut into it to provide isolation, instead of (or in addition to) gaskets
- Lattice mount – PCB or plate rests on 3D-printed lattice blocks
- Acrylic/FR4 stacks – a low budget mounting system where you just have layers of acrylic or FR4 held together by screws and standoffs.
There are of course a myriad of mounting styles, often without given names. Keyboard University has an overview of the common mounting styles (with images!).
6. Plates
The plate is the skeleton of the keyboard. This deceptively simple part is key in determining how the keyboard will feel. The materials, the flex cuts (or lack thereof), and the acoustic cuts (or lack thereof) hugely determine how your keyboard will sound and feel.
In 2025, the industry has coalesced around two options – Polycarbonate (PC), because its cheap and bends, and FR4, because it is cheap and doesn’t bend. PC can be molded by the thousands easily. PCB factories of Guangdong, having been optimized for cost effective production, can make FR4 plates for cheap at any scale, large or small.
However, plates can be made from a number of other materials such as :
- Brass
- Steel
- Aluminium
- POM
- Carbon fiber
- Polypropylene
- Plateless (technically not a plate but…)
These materials tend to be more expensive, so they are usually not featured in mass market keyboards.
While the basic design of the plate is simple – A 1.5-1.6mm layer with the correct holes for the switches to slot into, keyboard designs often modify the plate to alter the characteristics of the keyboard. The most common additions are flex cuts, which as the name suggests, are cuts in the plate to increase it’s flexibility. Acoustic cuts improve the acoustics. For the most flex addicted people, cuts are not enough, so they just ditch the middle portion of the plate altogether and create “half plates”.
The plate is also key in the mounting system for styles like gasket mount, where the implementation of the plate directly affects mounting feel.
7. PCBs
The brain of the keyboard – to which the switches, daughterboards, knobs etc. are connected. Unlike most consumer electronics, the value of the PCB doesn’t just lie in the circuitry. But rather it acts as a structural component as well.
From a structural perspective, the most important ways in which PCBs vary are through the thickness of the PCB, and the presence or absence of flex cuts. The thinner the PCB is, the more flexible it will be. And if it has flex cuts, it will flex accordingly.
The other important attribute PCB determines is whether your keyboard is hotswap, soldered, or supports both. There are two kinds of hotswap sockets – Kailh-style (popular), and Mill-max style (better).
PCBs are almost always made from FR4, but in theory you can make it using other materials like CEM-3, PTFE, or Polyimide as well. Or go completely PCB-free and hand wire.
8. Foam all the way down
Like beige paint. Devoid of personality. Each layer of foam progressively dampens the sound the keyboard makes. It can make keyboards sound less hollow, but at the expense of smothering out the sound of the switches, the plate and indeed the case itself.
Too much foam and your keyboard and the rest of your tuning is for naught. Your foam filled keyboard will sound like every other foam filled keyboard.
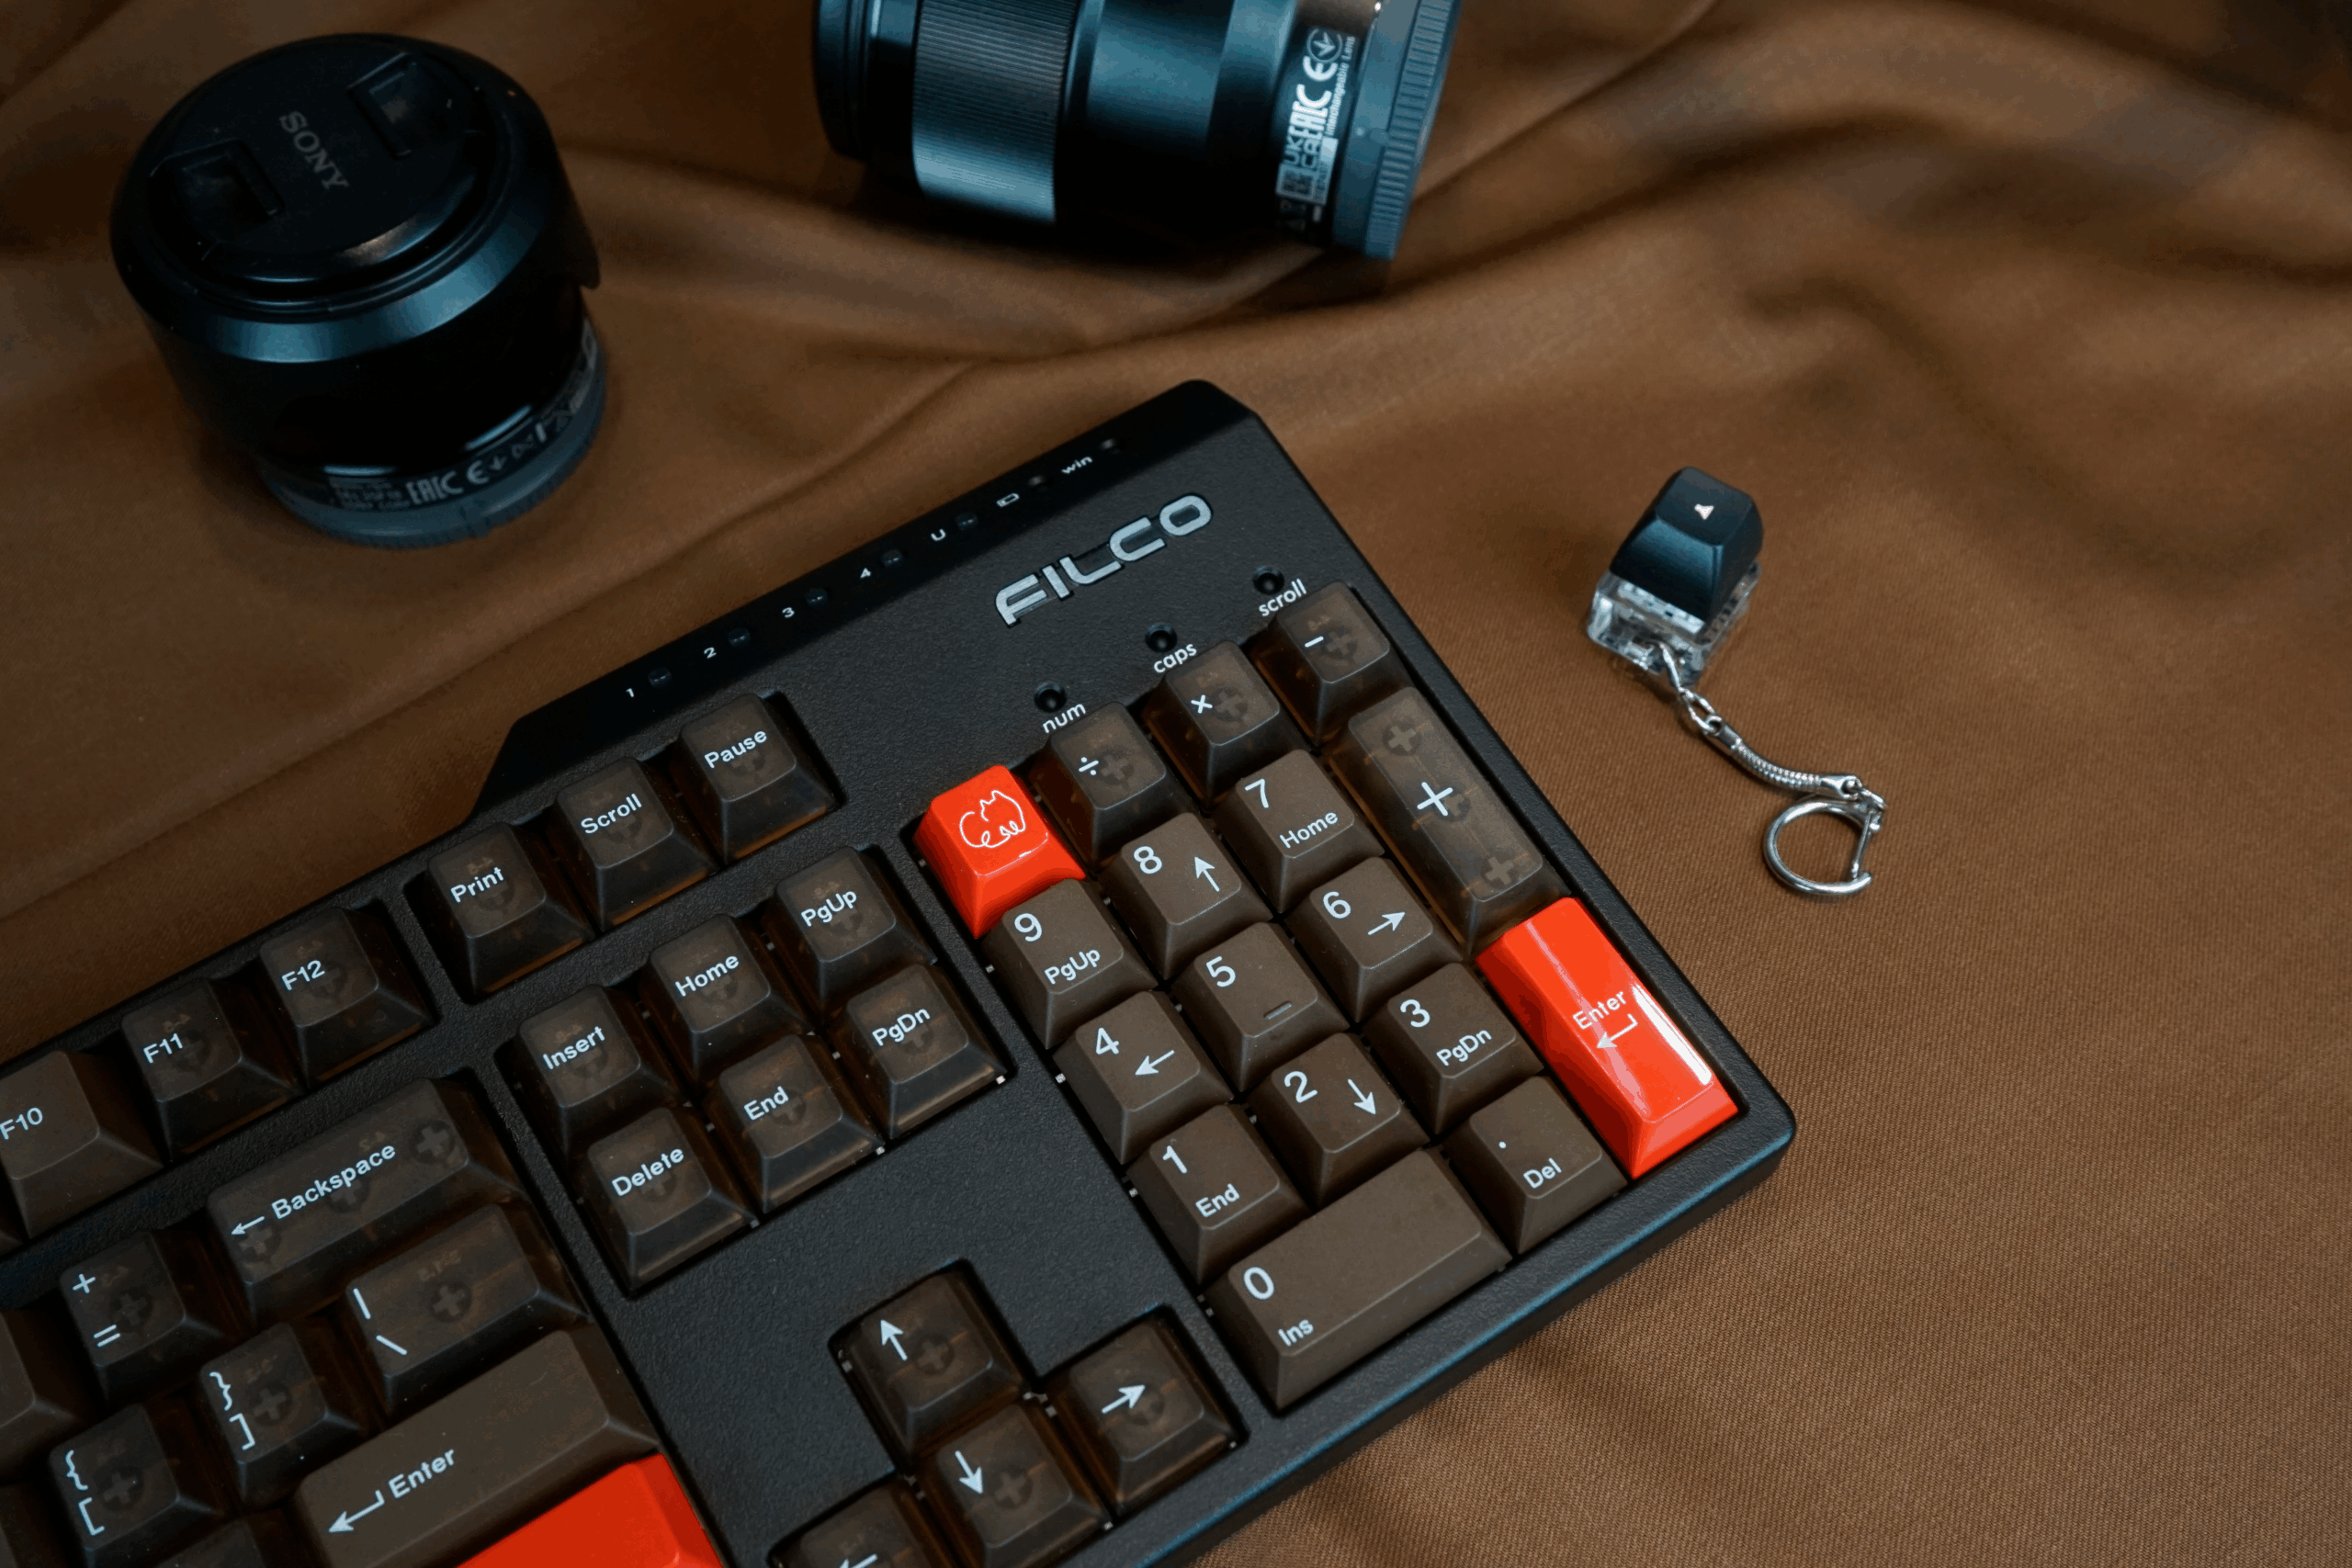
9. Stabilizers
The mechanism which ensures that when you press a long key like the spacebar or backspace, you can press anywhere and it will go down. There are numerous mechanisms which do this, but broadly there are two variations in common use today – Costar style (used by companies like Filco and TVS), and Cherry style (used by everyone else). Cherry style can further be broken down into two styles – PCB mount and plate mount. PCB mount stabilizers are either clipped in or screwed in to the PCB, and plate mount stabilizers are clipped into the plate.
For an in-depth review of stabilizers, I suggest reading Ryan Norbauer’s post on Stabilizers.
10. Knobs, screens, and other accessories
The incredible flexibility of keyboard design means that you are not just limited to having the keys. You can go ham with additions. The most common ones are knobs/rotary encoders and screens. However, plenty of designs with other additions like solenoids, track points, joysticks, ball encoders etc. exist. The only limit is your creativity and budget.
11. The case
The outer carapace of the keyboard. The enclosure of the components, and a deciding factor for your build. Cases are broadly made of two-sets of materials – either metal or plastic (though by no means are you limited to that – keyboards made of wood, concrete and even cardboard have been done).
A common myth is that plastic keyboards are budget while metal (usually aluminium) is premium. The kernel of truth behind the myth is that low budget keyboards often use injection molded plastic – because it becomes incredibly cheap at scale. However, well designed and engineered plastic keyboards can also cost a pretty penny (and be worth every single one). Aluminium keyboards are more expensive because they are CNC machined, and prices plateau even at scale. However, techniques like casting before machining can greatly reduce costs.
The design of the case is critical in determining its mounting type – whether the PCB-Plate assembly have to be screwed in, friction fit, mounted between gaskets or something else.
But their effect goes far beyond that. The height and angle affect ergonomics, the presence or absence of a weight can transform the sound, the internal shape of the case itself in fact significantly affects acoustics, and of course the case can add or remove visual flair from your keyboard. From the classic Majestouch design, to sleek beasts like the Cloudline TKL, to keyboards with inbuilt tenting like the Neo Ergo, there is no limit to how much variation you can have. The DIY end of the hobby has produced everything from the Qlavier Keeblade to the Nokotan60.
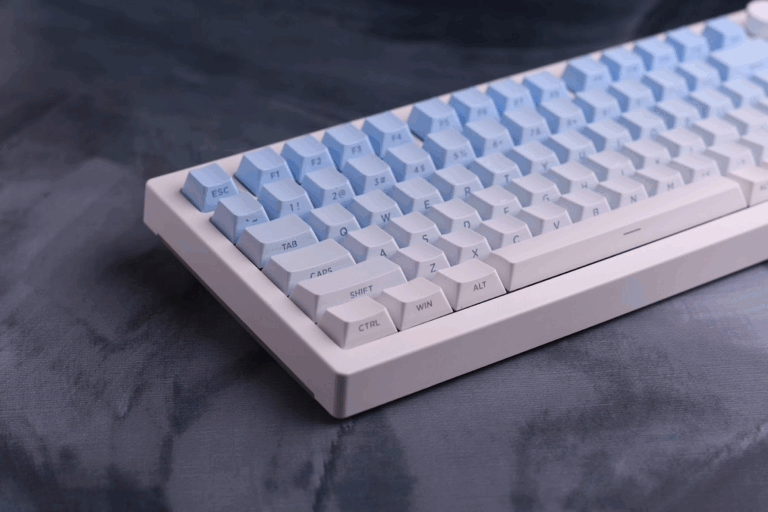
12. The layout
With all of the above said and done, we still have to consider the ways the keys are actually placed. The mainstream layouts would be:
- 60% – only the alphanumeric and associated modifier keys.
- 65% – 60%+arrow keys
- 75% – 65%+function row
- TKL (Tenkeyless) – The familiar 104 layout, but with the numpad removed.
- 100%/Full size – the layout for the singularly most based people – the productive members of society.
Then you have the weirdos and real gigachads – the people who make the hobby fun – the ergo and 40s keyboard community. These keyboards abandon conventional wisdom. Ergos lay the keyboard out to suit your hands, while 40s decide to remove all but the most essential keys.
Even within the above you have variations, which usually don’t get their own layout name, but may be used as prefixes or suffixes.
- WKL – Winkeyless – the windows key is gone.
- HHKB – Uses a bottom row layout like the (ANSI) HHKB
- Tsangan – A keyboard with a slightly longer spacebar (7u vs. 6.25u), ctrl and (1.5u vs 1.25u), and slightly shorter win key (1u vs 1.25u). The fn/menu key is omitted.
- FRL – Function-row less – Remove the F-row.
- F13 – F1-F12 are placed closer together, and a 13th key is added.
- Split – Any keyboard in two halves.
13. Putting it all together
Keyboards are a deep rabbit-hole with endless branching and variation. What makes them addicting is the ability to tune and improve the keyboard to your requirement. The sky (well, your bank account) is the limit.
There are mechanical keyboards catering to every kind of consumer – from people who want no-nonsense workhorses, to people who think that a keyboard needs to be shaped like a key, literally.
The sound, the feel, the visual aesthetics, the layout, and the ergonomics can all be customized to your liking.
You have options ranging from the budget to the extreme high end, custom one off pieces. The expansion of the hobby however has created the ability to mix and match many different parts – you don’t like the switches? Change them. Bored of your keycaps? They’re gone. You want a more or less flexible plate? Just get a new one. Think that the weight of the switch is too much? Believe it or not, you can get new springs to change it.
14. The community
The mechanical keyboard, like any hobby lives and dies by it’s community. Designs by community members have often pushed the envolope, and later been adopted by the mass market. The most popular firmware for custom keyboards, QMK, is open source and community driven. Many of the keycap designs you see out there were done by the community. This community is active on Reddit, Discord, Instagram, and more. The community members write guides and help new people with designing their own keyboards, expecting nothing in return.
However, unfortunately as with any growing community, it isn’t without it’s drama. Ranging from people claiming moral rights over colour schemes (that they themselves copied from Waifu of the Season) to the community’s open and trusting nature being taken advantage by bad actors running scams. And then the issue that might have lead you to land on this blog in the first place – the mountains and mountains of bullshit about keyboards. Pushed by companies wanting to sell cost-engineered items as precision engineered examples of functional art, or “influencers” posting ludicrous claims to catch more eyeballs.
Unfortunately the soul of the hobby has moved into closed communities like Discord. Indeed, with the advent of LLMs, the open internet will become increasingly soulless, and overrun with spam. This series is an attempt to bring some of that knowledge back to the open internet, somewhat ironically, by a corporation looking to sell keyboards.
15. The rabbit hole beckons
The rabbit hole is deep and full of dangers. You may start simple, with a cheap hotswap keyboard. But slowly you will be lured in first, by changing keycaps and switches, then hand lubricating or doing not so well thought out mods you found on YouTube, to joining group buys for the new best thing, and maybe eventually even designing your own keyboards. Before you know it, you will end up with random switches just lying around your house. Keycaps you bought just sitting around – waiting for the perfect keyboard to mount them on. Keyboards being displayed on a mantle, instead of being typed on. Your will spend more time tuning the sound of your keyboard than the strings of your guitar. You will develop opinions on everything from typing angle to the type of lubricants used in switches. You will decide that 65g switches aren’t quite right, and you need 67g springs. You will see people dropping $1000 on a keyboard, not blink twice. You may even regret the fact that it wasn’t you.
Welcome to the rabbit-hole.